Bagpipe Underground | New to Bagpipes?
You've assembled the chanter. You've seated your fingers correctly -- or close enough that you're willing to try. Now you're going to blow into it and make a sound, and that sound is probably not going to be what you expected.
That's fine. Expected is for later. Right now we're going for intentional.
What the Practice Chanter Actually Sounds Like
Before you make your first sound, a quick reset of expectations.
The practice chanter does not sound like bagpipes. It sounds like a reedy, slightly nasal woodwind instrument with an accent you can't quite place. This is normal and correct. The full pipes have a rich, resonant tone produced by the bag, the drones, and a much larger chanter reed. The practice chanter has a small reed in a small tube, and it sounds like it.
You will also sound bad at first. This is not a character flaw. It's physics. Every person who has ever played bagpipes at any level of competence started by making sounds that caused household pets to leave the room. The path from that to music is what you're on. Just keep moving.
The Breath
Here is the most common mistake beginners make on the practice chanter: they blow too hard.
The practice chanter requires a steady, controlled, moderate stream of air -- not a big lungful of effort, not a quick puff, not the kind of breath you'd use to blow out birthday candles. Think of the air you'd use to fog up a pair of glasses. Steady. Consistent. Not heroic.
When you overblow, the reed vibrates too fast and the note goes sharp and thin, or it squeals outright. When you underblow, the reed barely moves and the note is flat and weak, or it doesn't speak at all. The sweet spot is a consistent medium pressure where the reed vibrates freely and the note comes out clean.
Finding that pressure is the work of the first few sessions. You will overblow and underblow many times before your breath learns the right setting. This is expected. The goal is to develop what's often called a "steady air column" -- a continuous, even flow of air that doesn't surge or drop. Think of it less as blowing and more as holding a sustained breath pressure.
A practical test: Play Low G with all holes covered. Hold it for as long as you can while keeping the tone steady and consistent. When it starts to waver, you're running low on air -- stop, breathe, start again. Don't try to squeeze out the last little bit by pushing harder. The moment you push, the tone changes and the pressure habit you're trying to build gets interrupted. Stop cleanly, breathe, restart.
The Passing Out Part
You will not actually pass out. Probably.
What does happen to many beginners is mild lightheadedness, especially in the first few sessions. You are using your respiratory system in an unfamiliar way -- not the normal relaxed breathing of daily life, but controlled exhalation under pressure for sustained periods. Your body needs a little time to adapt.
The fix is simple: if you feel lightheaded, stop playing. Breathe normally for a minute. Don't try to push through it. Passing out onto your new practice chanter would be unfortunate for everyone involved.
Keep sessions short at first -- fifteen to twenty minutes is plenty. As your breath control develops over the first few weeks, you'll find the lightheadedness disappears. Veteran pipers can sustain playing for long periods without issue, but they built up to it.
Your First Sound Goal
Here's a simple progression for your first real playing session:
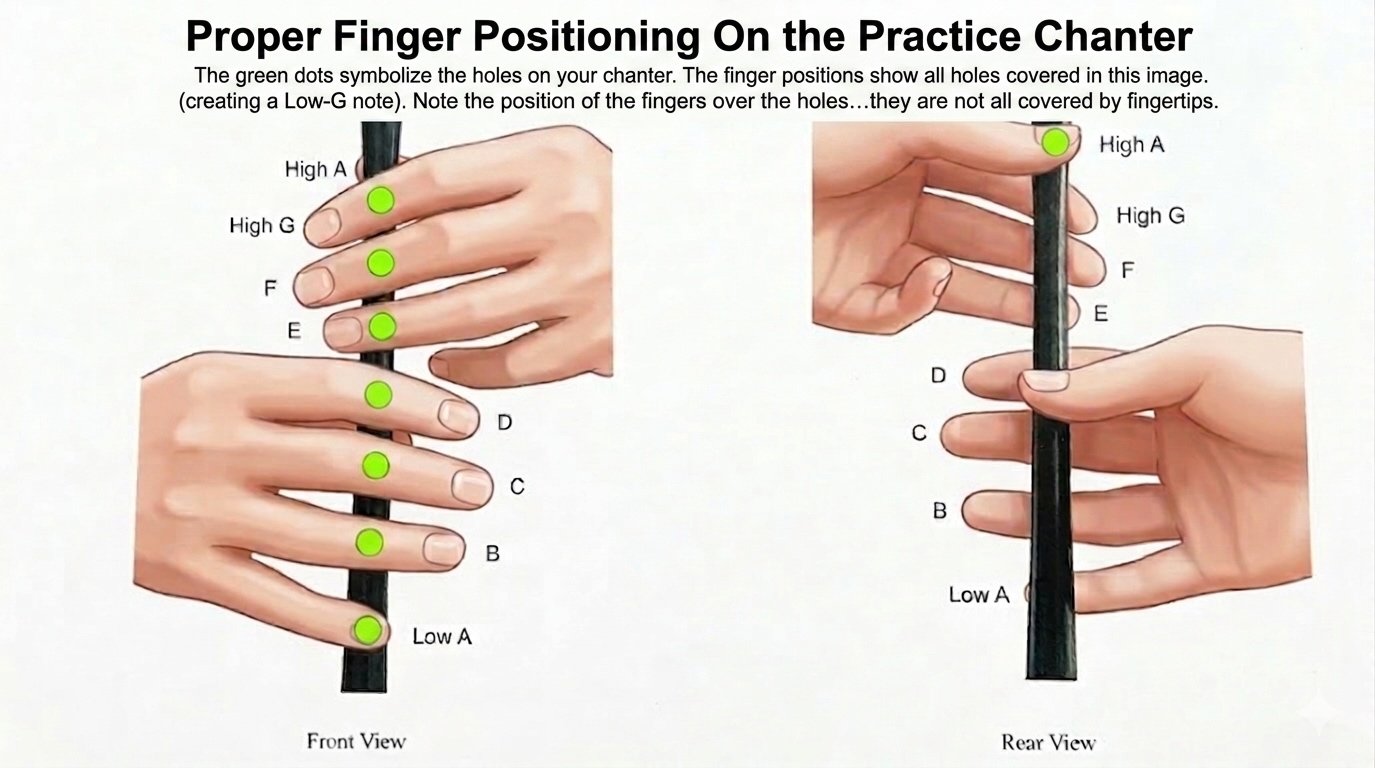
First, play Low G -- all holes covered -- and hold it for five counts at a steady tone. Not loud, not soft. Steady. Do this several times until it feels repeatable.
Then add Low A -- same thing, but with your right pinky finger lifted. Hold it for five counts. Compare the tone to Low G. They should feel similar to produce. If one feels much harder than the other, something is off in your finger position or breath pressure.
Then practice moving between Low G and Low A. Down to Low G, up to Low A, back to Low G. Slowly. Cleanly. No rushing. This is not a tune. It's a mechanism check. You're confirming that you can change notes intentionally and repeatably without the sound collapsing during the transition.
When that feels manageable, you're ready to start working through the full scale -- all nine notes.
Four Ways It Can Go Wrong
A correctly produced note on the practice chanter is clear, steady, and consistent in pitch. It speaks immediately when you start blowing and holds its pitch without wobbling as long as your air pressure stays even. If what you just produced didn't sound like that, you're probably hitting one of these four failure modes.
A squeal or squeak. Usually caused by too much air pressure, an uncovered hole, or a finger not fully seating on the hole. If you squeal, don't flinch and pull the chanter away -- that makes the habit worse. Instead, back off the air pressure slightly and check your hole coverage.
A flat, dull tone that barely speaks. Usually too little air, or a reed that needs a moment to warm up. If you've just assembled a cold chanter in a cold room, the reed may take a few seconds to find its voice. Give it a moment before concluding something is wrong.
A wavering, unstable pitch. Air pressure isn't steady. Your breath is surging and dropping rather than flowing evenly. Slow down, focus on the column of air, and aim for consistency over volume.
A honk or a choked sound. Usually means the mouthpiece isn't seated correctly or the seal isn't clean. Make sure your lips are sealing evenly around the mouthpiece and that there's no air escaping around the sides.
One More Thing About the Reed

Reeds are not forever. Over time -- weeks to months depending on how much you play -- a practice chanter reed will wear out. The tone will start to sound dull, or it will become harder to make speak, or it will squeak unpredictably even when your technique is correct. When this happens, the reed needs to be replaced. Replacement reeds cost just a few dollars and are widely available from any bagpipe supplier. Don't assume something is wrong with your technique before checking whether the reed has simply lived its life.
Also -- if your practice chanter sits unused for a while and then sounds odd when you pick it back up, the reed may just need to warm up and moisten slightly from your breath. Give it a minute before panicking.
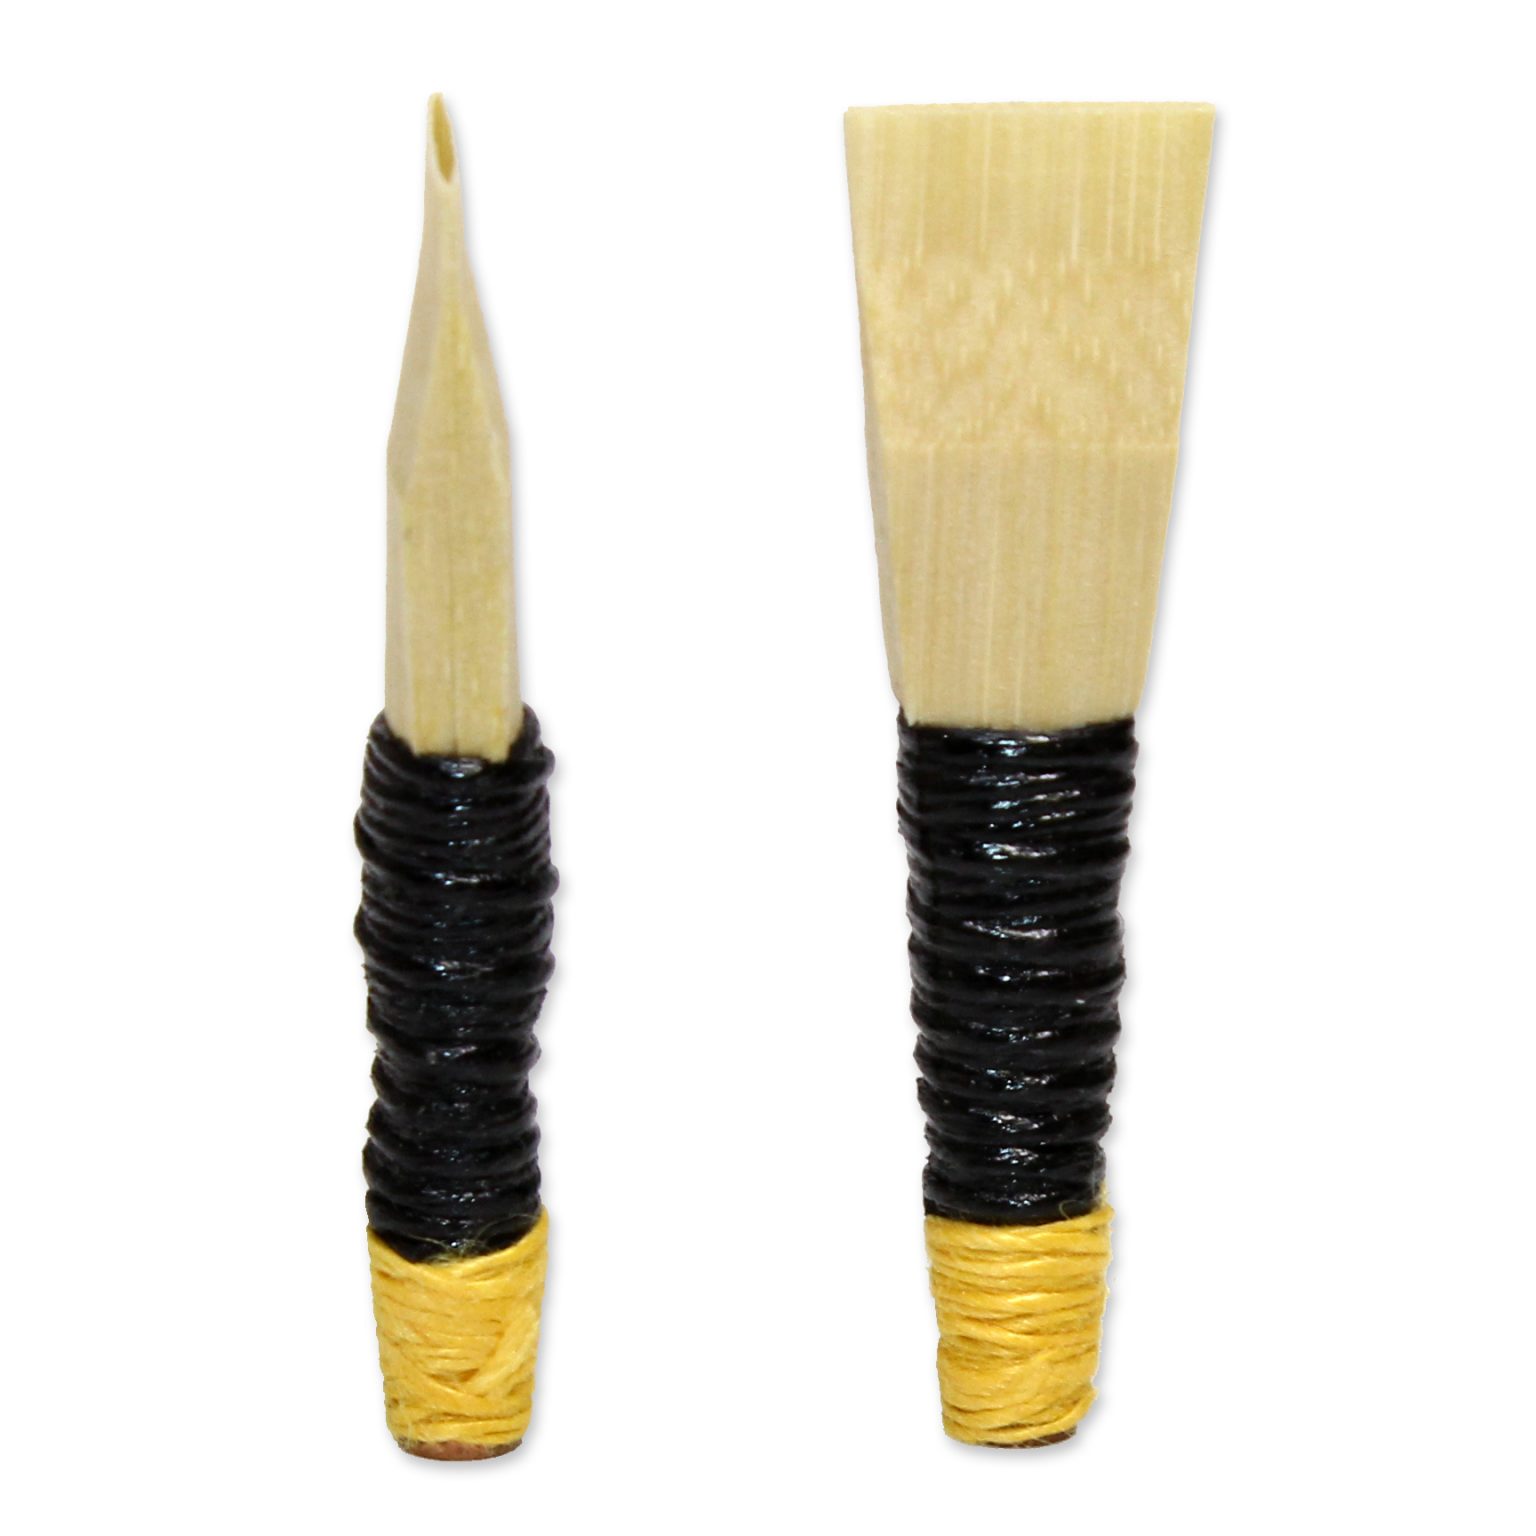
A note for later: the reeds in the photo above on the right are not practice chanter reeds. Those larger double reeds live inside the chanter of the full Highland pipes. They work on the same principle but require much more air and much more pressure -- the kind of difference your eventual teacher will walk you through when the time comes. For now, the small reed in your practice chanter is the only one you need to worry about.
Coming up next: the whole bagpipe scale, all nine notes, with a chanter fingering chart you can keep in front of you while you play. Read The 9 Notes That Run the World.
Or head back to Beginner Articles to see the whole map.